The Hairducation Consultation Service: How It Works


Picture on the left : the amount of hair a client used to loose on her wash day. Picture on the right: the amount of hair the client lost on her very first wash day following the regimen I created for her. And her hair continued to get better and better.

Hello ladies,

I get so many emails from ladies enquiring about the services I offer or how I can help them with their hair.

Over the years I have updated how the service works and I thought I should share a summary about the packages currently offered within the Hairducation Consultation service. I will provide a much more detailed breakdown of how the service works for ladies who having read the information below, are interested in booking the service.


Hairducation Consultation Packages

Consultation clients have three packages to choose from.  The summary of the packages is set out in table below.


Consultation Table 1


When the consultation service is completed, the clients file can be closed however having consulted with clients for 4 years plus, I have had a lot of requests from clients who would like more long term support with their hair journey.
In addition to this, some clients after a few years make significant decisions like transitioning and want guidance from me with their new journey. For these reasons, I have recently began offering the follow up options in the table below to my clients


Consultation table 2


I hope this post gives you some insight about how the consultation service works.  The consultation service is an online service and is available worldwide through Whats App video calls or Skype.
Please send an email to rehairducation@gmail.com  for further information, prices of the packages and follow up service and to make a booking.

If you scroll up to the Menu Bar you will notice that I have added a  “Services Tab” where  I will list all Hairducation’s Professional services going forward.

My next post will be an educative one about some common protective styling mistakes which may prevent you from retaining length.  Sounds like a good post dosent it?  Come back soon to read it 🙂

x

Lade
Learn| Change | Grow


Taking A Closer Look At Split Ends

Microscopic image of a split end


Hello Ladies,

Todays post will be a quick and straight to the point post about split ends, what causes them, how best to get rid of them and a mistake you should avoid when getting rid of split ends.  I will also share some images I have taken with my Trichoscope of split ends which I hope will drive home a few points.


Common Causes of Split Ends

  1. Letting your hair become dry and brittle
  2. Using high levels of direct heat
  3. Excessive and aggressive manipulation
  4. Lack of protective styles
  5. Sleeping on cotton pillow cases without a satin scarf or bonnet


Facts About Split Ends

  1. Split ends cannot be repaired. Do not let any product manufacturer fool you.  Hair products can only make split ends look better temporarily.  The only permanent solution to split ends is to cut them off.

Healthy End Cut with Hair Shears (scissors)


  1. Cutting off split ends with regular scissors will result in ends that are not sharp and will fray and split much more quickly. I can back up this fact with my own experience.  When I began using proper hair scissors to cut my hair, my ends stayed split free for longer.  My trimmed ends seemed to take much longer before they are in need of a trim (aside from when I had hard water issues which you can read about in my last post).


  1. A mistake many ladies make when they happen to spot a split end in their hair or a single strand knot to pull it off. This is the worst thing you can do.  You would be better off leaving the split end in your hair than pulling it off with your fingers.  When a split end or single strand knot is pulled off or broken off with our fingers, we create a very damaged and thin end.  Pulling, breaking or tearing off a split end also tends to create a new damaged that tends to be long and tapered, basically you create a much larger area of damage.I captured the image below after tearing off a split end and you can see the end has a long area of damage which I have indicated with the pink marks.  Also, if you look closely, you will see that the cortex layer (inner layer) of the hair which looks like a like a tube in the picture below is now exposed and visible. Pulling off the split end tore off the cuticle layer which is supposed to protect the inner layer.

139 - Copy

I hope seeing what happens to ends that are torn or broken off with our hands deters you from do that your hair.  It certainly worked for me and now I tend to grab my scissor when I find a single stand knot in my hair rather than snap them off like I used to.  A good time to do this is when you are detangling and moisturising your hair, have your hair scissor nearby so you are not tempted to snap off the knot or split end.

The best way to fight split ends is to avoid getting them in the first place by being consistent with your regimen.  Keep your hair moisturised and sealed especially the ends.  And if your ends are damaged and /or just very old and weathered, cut it off, do it in stages if that’s what you feel comfortable doing.


I am hope you found this post useful. See you soon for my next post, I haven’t decided what the topic will be yet but…..it will be good. : )


X

Lade


Texlax Update April 2018: Part 1

Hello ladies,

I hope your hair journeys are going well and that your hair is well hydrated and breakage free😊

I finally texlaxed my hair!!!!  To be exact I did the texlax on the 16th April, just over two weeks ago. My schedule on my texlax day meant I didn’t have time to stop to take pictures.  I have had one wash day since I texlaxed but again I didn’t get round to using my camera but I did take some short videos using my phone.

If you follow me on Instagram, you may have seen one of the videos.  I will share some screen shots of the video in this post and will put up the rest of the videos on my Instagram stories.  In this post I will share how my texlax day went, my texlax process and then share the pictures which show my current length.


My Texlax Day and Process.

Ladies, almost 7 months of new growth is not a joke.  After my Ready Steady wash day, I wore my hair in a simple bun up-do for 4 days.  I detangled and moisturised and sealed lightly during the week. By day 5, my texlax day, my hair felt a little matted and dry, why??  I had used very little moisturiser during the week as I didn’t want my hair to feel or get wet because wet hair isn’t supposed to be relaxed.  Also, although I detangled regularly , because I didn’t want  to aggravate my scalp, I didn’t pull or stretch my new growth, so it had shrunk and matted  a bit. The point I am trying to get to is that preparing my hair on my texlax day took a while because of the amount of new growth I had to detangle very gently.  Detangling 20inches plus of hair in small sections is time consuming.

After I got through prepping my hair, the rest of the texlax day was a breeze.  I followed my usual process and timings which you can read by clicking here.


My Current Length
After applying my leave-ins, I blow dried in sections and I cut two inches off my ends because I do not want longer hair.  I am maintaining waist length.  In the pictures in this post the black belt is my waist line.  My hair is a little longer than waist length so I will trim off an additional inch in a few weeks.


Currently my hair is doing quite well, and I will have it out for a while before the wigs make a comeback. Although this is more of a hair update post, I hope you have learnt something new from my relaxer process.  Have your relaxed or texlaxed your hair recently?  How did it go?


I mentioned in my last post that my hair faced some major challenges over the last year.  In my next post I will share more about how bad it got, how it led to me cutting off 5 inches off and how I grew the hair back and how I got my hair to grow faster than normal.  You don’t want to miss it.  I should have taken proper relaxer update pictures by then too….so see you soon.

x

Lade

Learn | Change | Grow

Ready Steady: Preparing your Hair for Relaxing and Permanent Hair Colours


Hello Ladies,

‘My hair is breaking!! I don’t know what happened, its been breaking so much and I don’t know why’ .
Lade, can you tell me how to make the breakage stop?

This is a question and scenario I have heard and been in so many times.   Each time I am faced with this question, I take a deep breath and ask myself, where do I start from? How do I explain that there are so many things that can cause hair to break and in most cases it usually isn’t one thing.

I will write more posts about breakage, the numerous things that can cause it and how best to prevent it.  In this post, I will discuss one of the most hidden reasons for damage and breakage and how to avoid it.

One of the biggest game changers and key contributors to my success on my quest for healthy and long hair was learning that hair must be prepared for relaxing or colour processing.    When I began my hair journey and took every aspect of it seriously, I stopped the habit of removing my hair from extensions and relaxing it the same day or the day after.   I did the right things instead.  Keep reading if you want to learn more 😊

 
Why Hair Should Be Prepared for Chemical Services
Relaxers and chemical hair dyes break down some of the protein bonds in the cortex layer (inner layer) of our hair and unfortunately this makes our hair weaker.  Relaxers and hair dyes are harsh processes and if done on hair that isn’t strong enough to withstand the process, will result in more protein breakdown than would have occurred had the hair been prepared correctly.  So yes relaxers and colours weaken the hair but the weakness will be a lot worse if you don’t complete some steps 4 to 7 days prior.

Now if you don’t prepare your hair for a chemical service your hair will not disintegrate or fall apart on relaxer or colour day.  As a matter of fact, it may even look great and feel great on relaxer or colour day and in the initial weeks afterwards.  Overtime (months and years) however, the hair will become so weak and damaged it will eventually break  and each strand will become thinner too. So ladies if you notice that your relaxed or coloured hair is beginning to break more and more and you can’t figure out why, note that incorrect preparation for the chemical process may be just one of the many reasons your hair is breaking.

My hair after my Ready Steady wash day. PS – excuse the corny hand on shoulder pose. I was hiding my underwear 🙂

How to Prepare Hair for Relaxing
For ladies who are new to Hairducation, I’d like to make it clear that contrary to popular belief, hair should not be very dirty before a chemical process.  Preparing hair for relaxing should begin 4 to 7 days before the relaxer or colour treatment.  A cleanse to remove build up from hair should be completed and this must be followed with a conditioning treatment that will fortify the keratin levels in the hair.  In other words, it isn’t your regular wash and condition day. This is one of the many reasons why we offer a variety of wash days at Hairitage.  We have a wash and condition treatment called Ready Steady which was designed specifically to be completed by ladies in advance of their relaxing or colouring services.

After the wash day, wait 4 to 7 days before you proceed to relaxing or colouring your hair.   You should leave your hair alone in those 4 to 7 days and avoid any intricate hair style that may stress or irritate your scalp.  A simple bun or goddess braids would be ideal.  Essential oils should be avoided that week too.
I will be relaxing my hair very soon after almost 7 months and I have completed my own Ready Steady wash day.  Cannot wait!!!!!

Do you prepare your hair for relaxing or permanent colour treatments? Yes or no??

My next post will be my relaxer update post and I’ll be sharing a bit about some major challenges I’ve faced with my hair over the last year and how I have overcome them.  Come back soon ladies!!!

Happy hair journey

x

Lade


The Benefits and Challenges of Natural and Relaxed Hair

Image source: Pinterest


Hello ladies,

I wrote a post while back about the differences between natural and relaxed hair regimens to help readers understand that there are many similarities in caring for both hair types.  If you would like to read that post please click here.

Working with so many ladies on their hair journey over the years via my consultation service, I have noticed the high volume of ladies transitioning from relaxed to natural.  A new thing I’ve noticed however is the increasing number of ladies going back to relaxing after being natural for a few years.  I get the feeling that in a few of these cases, some of these ladies are looking for a way out of hair care and think that swapping one hair type for the other will release them from the task of caring for their hair.

The reality is that both virgin and relaxed hair have their challenges and, in this post, I set out some the benefits and challenges of both hair types.


Benefits of Virgin (Natural) Hair

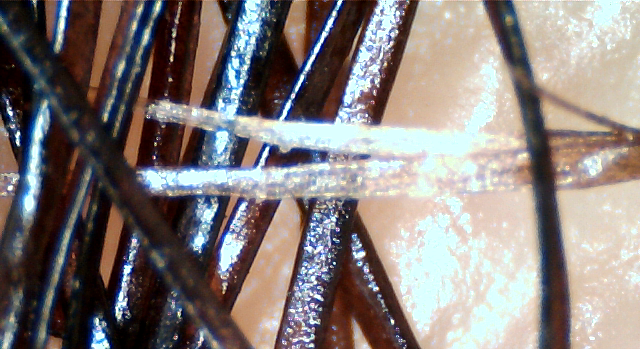
1) Natural hair that is well cared for is structurally stronger and healthier that relaxed/texlaxed hair that is well cared for.

2) Natural hair has a high level of elasticity which helps it fight breakage.

3) Natural hair fibres tend to have better volume, body and bounce than relaxed hair.

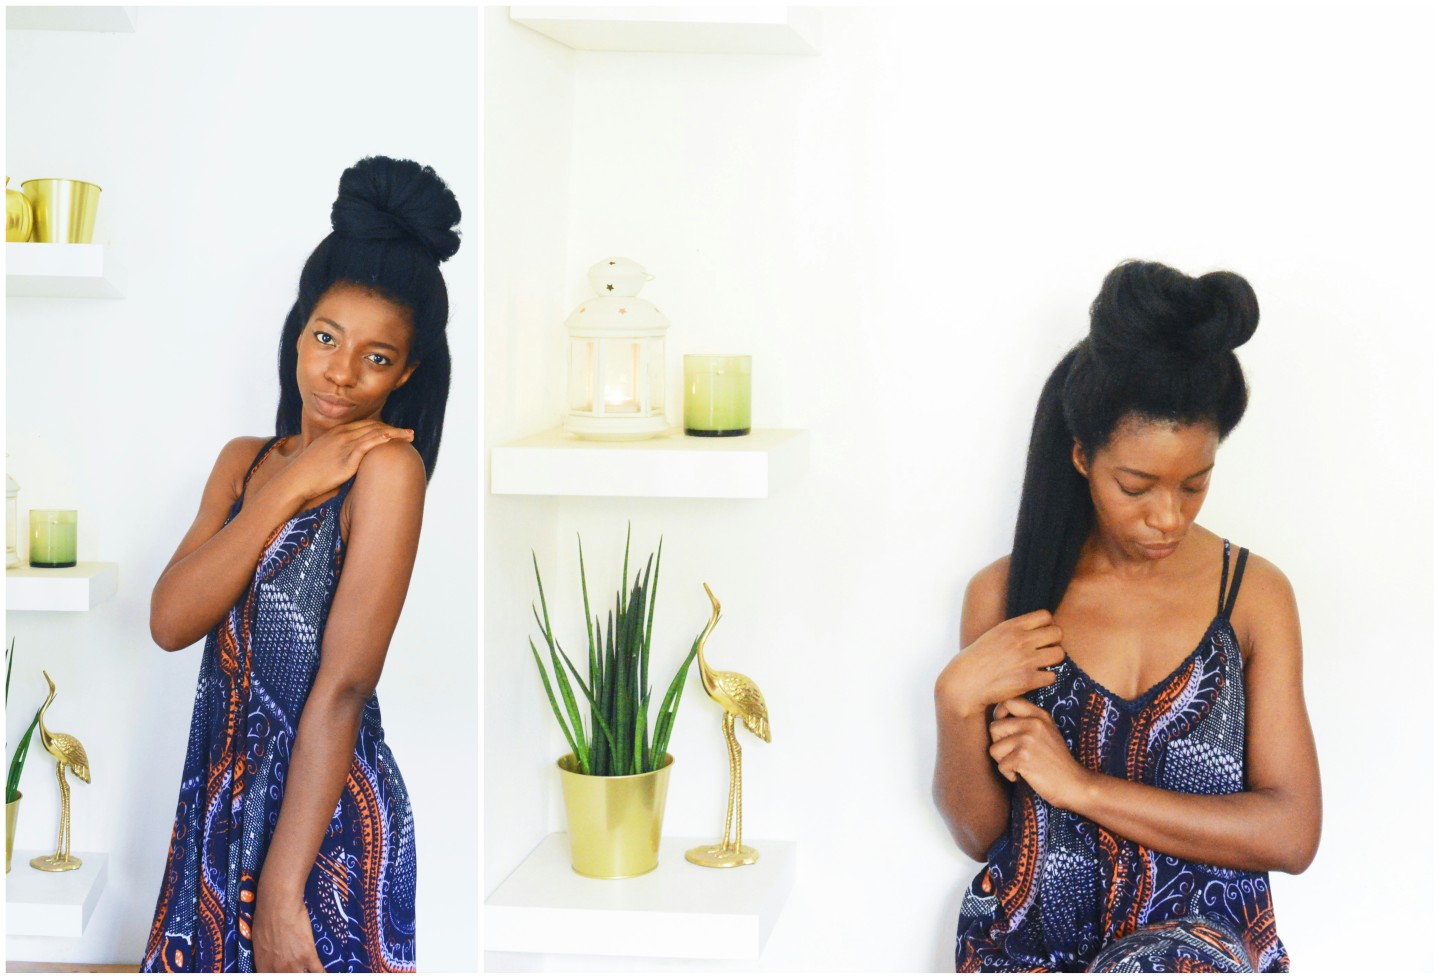
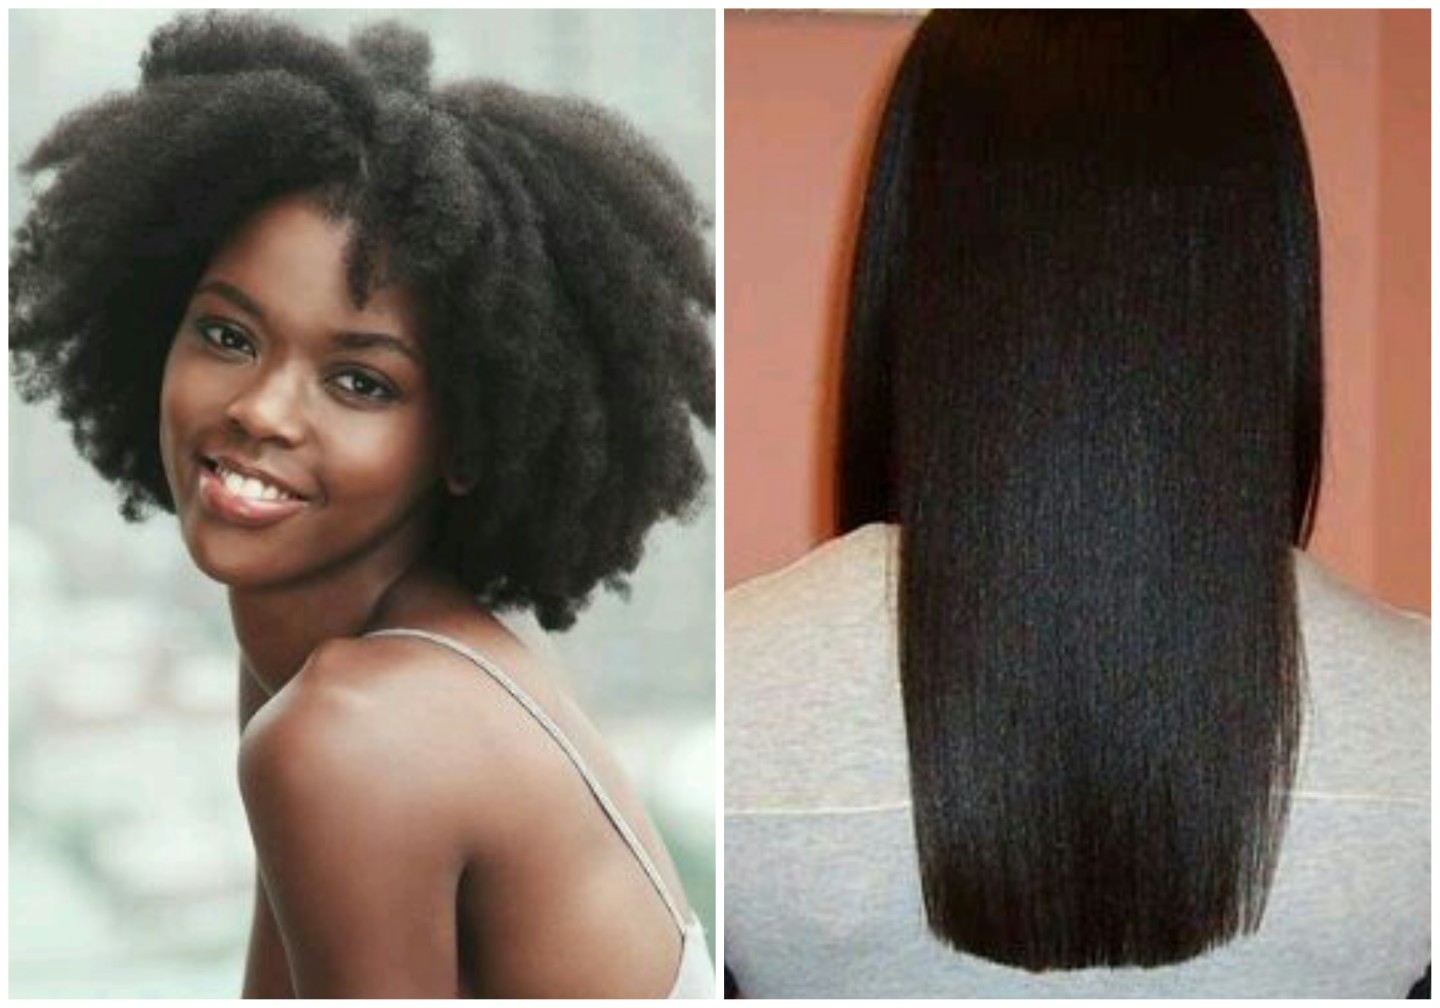
4) Versatility – Natural hair can be worn in straight hair styles and if healthy should revert to its kinky, coily and curly state when washed. Please note that the excessive use of heat can alter the texture ofnatural hair and in some cases, the hair may not fully revert to its original texture.

5) Natural hair has a  beautiful and unique hair texture


Challenges of Virgin (Natural) hair

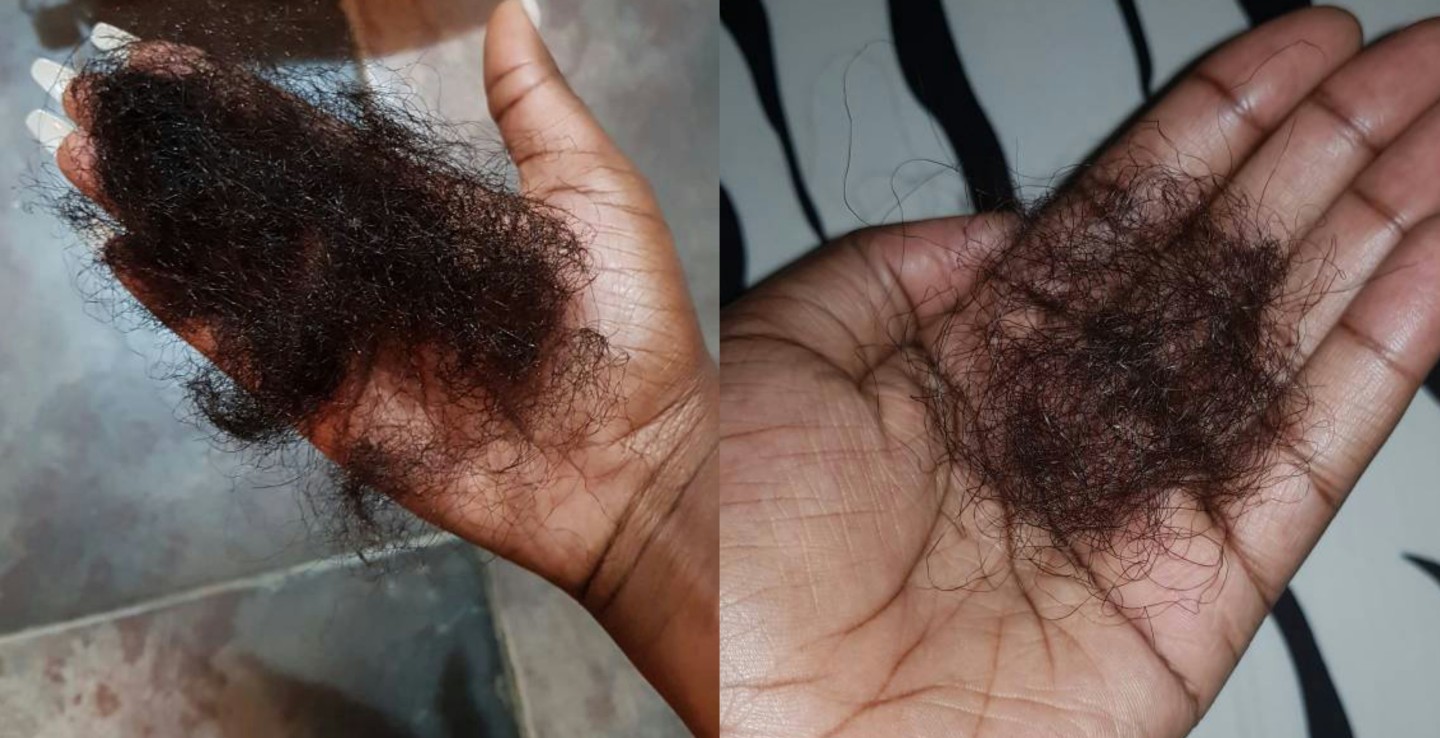
1) Although shrinkage is an indicator of healthy hair, natural hair that is left in its shrunken and compacted state for an extensive period will form knots, tangles and single strand knots.  Trying to detangle hair that is badly tangled and knotted usually results in some breakage.  For this reason, it is important for natural hair, when being worn loose, to be stretched out regularly.

2)  The structure of natural hair makes it prone tangling and knotting on itself and this makes it more susceptible to breakage from manipulation.  Combing and styling of natural hair must be done gently and only after being moisturised and detangled to reduce the risk of breaking.

3) Natural hair can be a bit more time consuming to detangle, comb and style than relaxed hair.  A key factor is the need to first stretch the hair before many styles can be created.  Some styles also require the use of many heavy gels and products to make edges sleek or make coils/curls pop however not all natural ladies go for that look.

4) Ladies who chose to wear their natural hair straight often achieve this look by using high levels of heat and this can result in heat damaged hair.


Benefits of Relaxed/Texlaxed Hair

1) Relaxed hair is less prone to knotting and tangling on itself because the relaxing process removes majority of the kinks and bends in natural hair fibres.  This reduces the risk of breakage from manipulation and some ladies find it easier to retain length when their hair is relaxed.

2) There is less risk of single strand knots forming and there is no need to continually stretch relaxed hair. Although relaxed hair, especially if texlaxed does experience some level of shrinkage, it is not at degrees as high as that of natural hair.

3) Relaxed hair is less time consuming. Simple styles can be created without the need to stretch the hair first.

4) Relaxed hair is faster to detangle and comb.  Please note that texlaxed hair, depending on how much texture is left in the hair and the length of the hair can be time consuming to detangle.

5) Versatility: relaxed hair when texlaxed can have the appearance and features of natural hair but can also be sleek and smooth like relaxed hair using very little to no heat.


Challenges of Relaxed/Texlaxed Hair

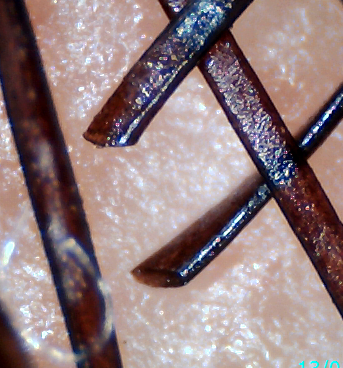
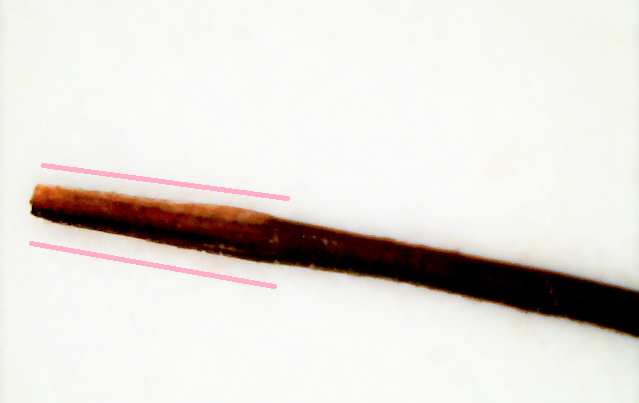
1) Relaxed/texlaxed hair is structurally weaker than natural hair.  The relaxing process breaks down the protein in hair fibres and this weaker structure increases the risk of breakage.

2) Relaxed hair has lost some of its natural elasticity and this also increases the risk of breakage.  Ladies who relax their hair should never allow their hair to become 100% straight when relaxing.  The maximum level of straightness should be approximately 80% so that there is some elasticity left in the hair.  The more texture you leave in your hair, the more of its natural strength and elasticity you will retain.

3)  Relaxed hair that is over-processed can have a flat and lifeless look and feel.  As already mentioned in the point above, not letting the hair go beyond 80% straight will help prevent the hair from becoming too limp.

4) Relaxed hair is easier to manage but more complicated to care for.  Relaxed hair often has multiple porosity levels.  It is difficult to determine the levels of protein and moisture balance that is right for each ladies relaxed hair.

What I hoped to achieve in this post is helping readers see that black hair has so many great qualities however it can be somewhat challenging to care for in both it’s virgin or relaxed/texlaxed state.  It is possible for both to thrive so long as you put in the work required to get the results you desire.  I hope this post has encouraged you in some way.

Do you think any hair type is easier than the other in terms of care?  Lets have an open non-judgmental conversation about this 🙂


My next post will be an educative one about a cause of breakage most ladies are not aware of.   I’ve drafted it already so it should be up this week.   See you soon.

x

Lade

Learn | Change | Grow